In this article, we will learn how to turn off trackbacks and pings on the WordPress website. They are the links notifications that keep track of when your content is linked to other websites. When you enable them, they appear in the comment moderation queue of your website.
Trackbacks and Pings were first introduced to notify the users about the linking of their blogs to another website. However, many spammers nowadays use this feature to send fake notifications of trackbacks and pings. So, disabling them would be a good option if you are not using it.
Here, we will be discuss 3 different process to turn off trackbacks and pings on WordPress website i.e.
- In Specific Posts
- All Future Articles
- All Posts
With that being said let’s get started with the tutorial:
Table of Contents
How to Turn Off Trackbacks and Pings in Specific WordPress Posts
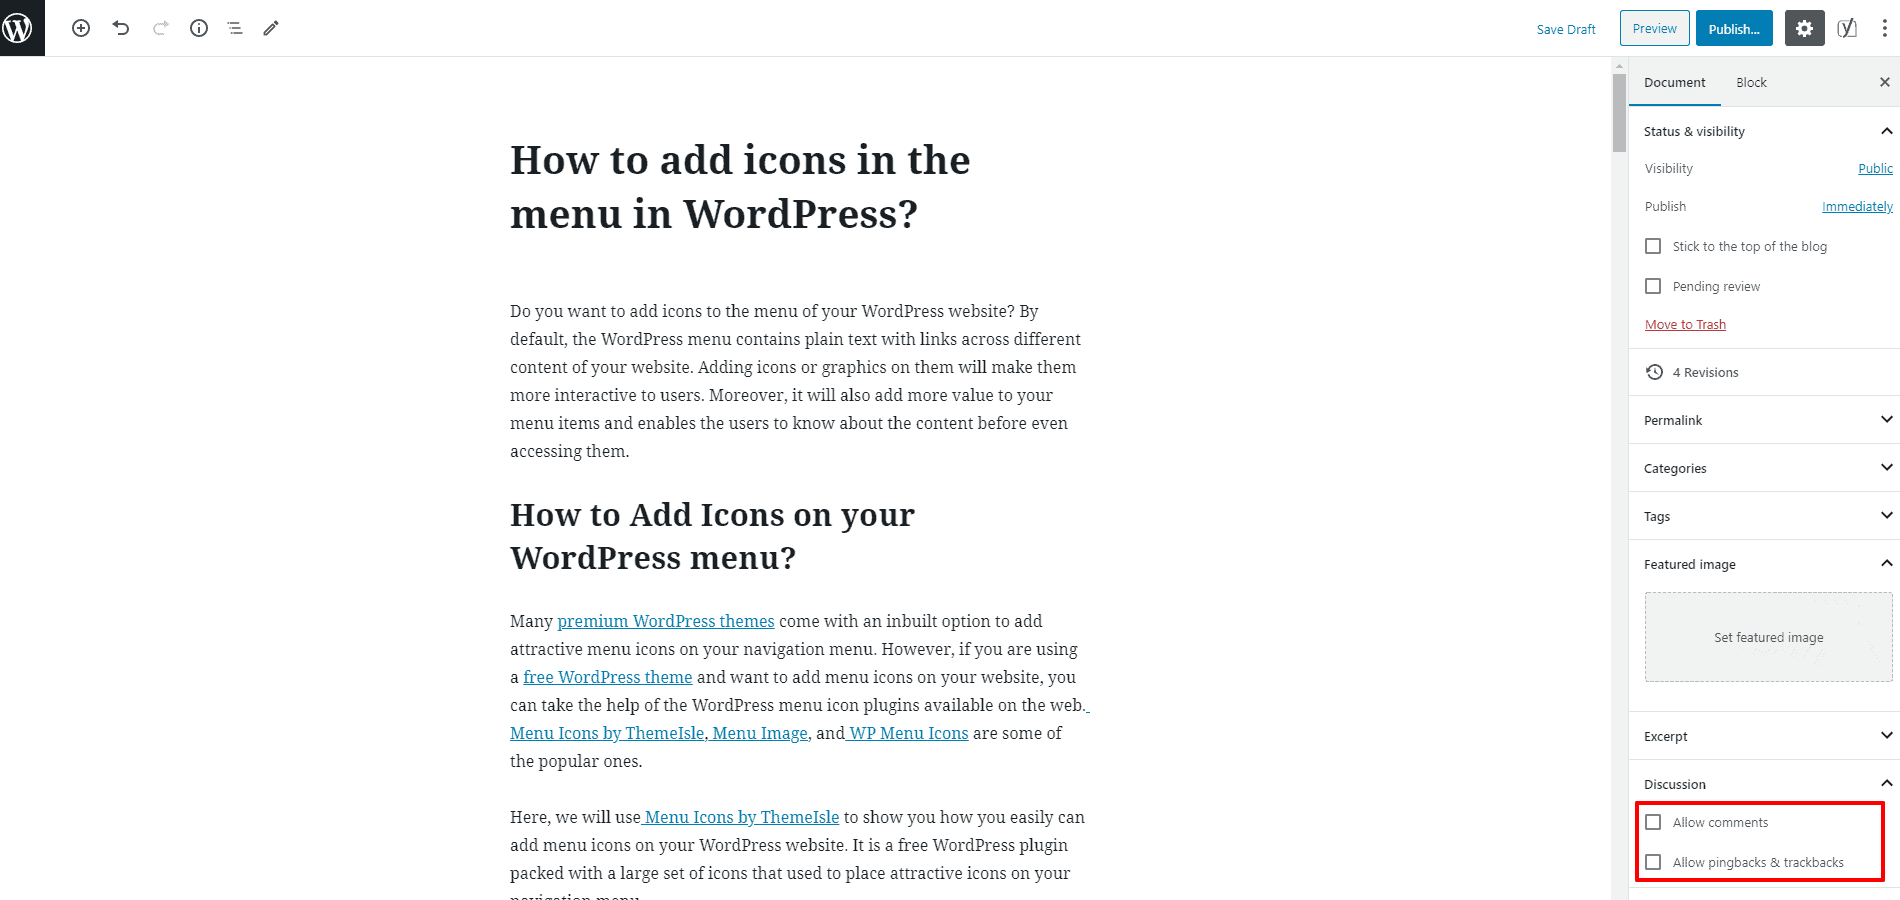
To carry out this process, edit any of the existing posts or pages.
Now go to Discussion settings on the Document settings of the right sidebar.
There, uncheck the “Allow pingback & trackback” options.

Once done, click on Publish/Update button to save changes.
Alternatively, you can disable the comments of specific post without going to editor.
To do that, go to Posts >> All Posts.
Hover on the post of which you want to disable the comment and click “Quick Edit” button that appears.

Uncheck the Allow Pings option and click on Update button.
How to Turn Off Trackbacks and Pings for Future Posts?
To disable the trackbacks and pings on your WordPress website, firstly you will need login to the dashboard.
Then, go to Settings >> Discussion page from the left menu of your admin panel.

After that, uncheck the box next to “Allow links notifications from other blogs (pingbacks and trackbacks) on new articles”.
Finally, click on the “Save Changes” button to save.
How to Turn Off Trackbacks and Pings in All Existing Posts?
This will turn off the trackbacks and pings on any new articles that you make live on your website. However, all your old posts will still have pingbacks and trackbacks available.
To disable the pings and trackbacks from existing posts, go to Posts >> All Posts.
Now go to the “Screen Option” button on the top right corner of the screen.

Then, enter 999 next to the “Number of items per page”. It displays 999 posts on your post list and allows you to disable trackback and pings of 999 posts at once.
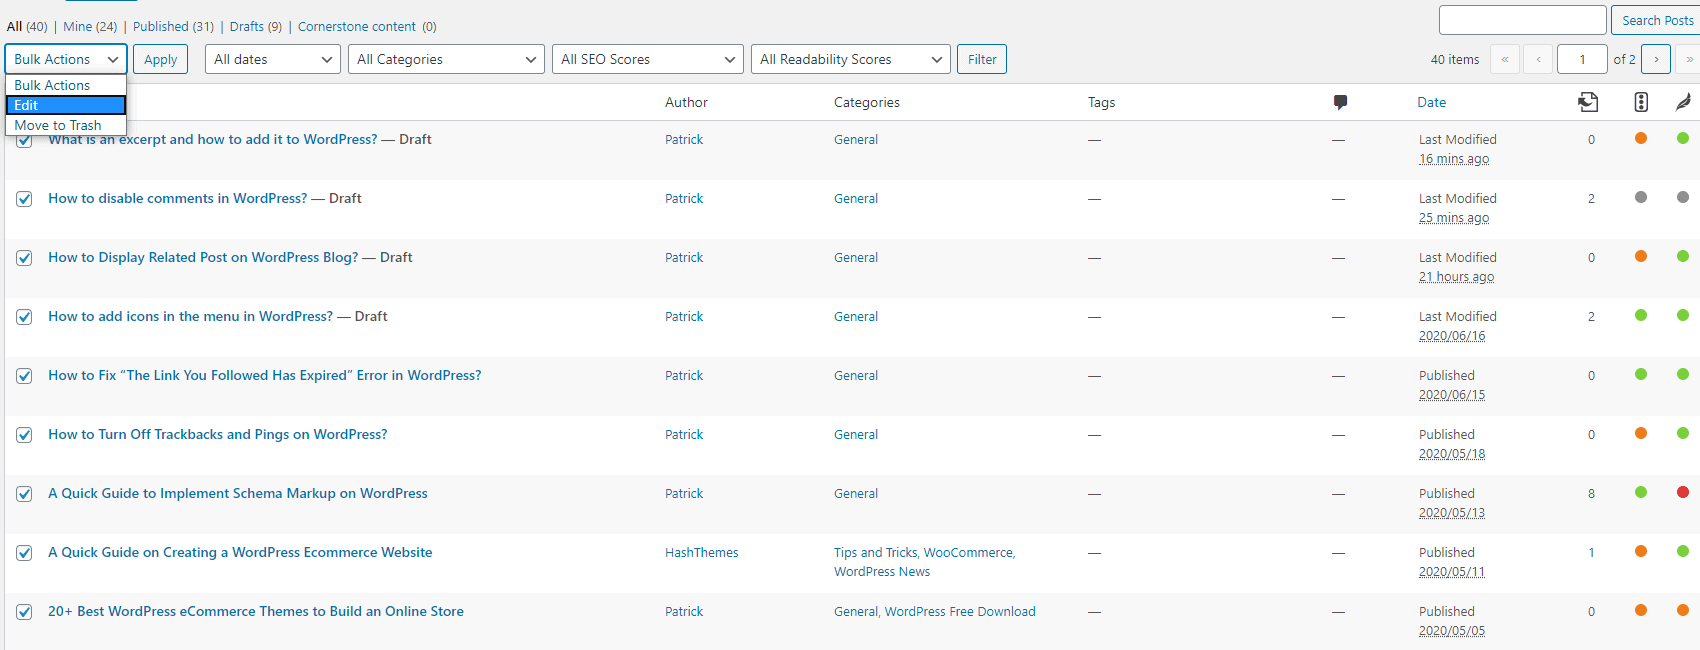
Now, select all the posts by checking the box next to the title label.

Then, select “Edit” from bulk action dropdown and click on the “Apply” button.
Now, the bulk edit box will appear with all posts on the list being selected.

In the bulk edit box, look for the pings option and change it to do not allow.
Click on “Update” to save changes.
This will disable the pings and trackbacks for all existing posts.

