By default, WordPress allows you to upload all popular media formats in image, audio, and video. But SVG is not among them. You cannot directly upload SVG on your WordPress site and there is a strong reason for that.
In this article, we will discuss what an SVG is, why you cannot directly upload it to your site and how to add SVG to WordPress website. With that being said, let’s get started:
Table of Contents
What is SVG?
Scalable Vector Graphics (SVG) is a file format built using vector graphics. It uses XML based text format to define how the image should appear. This makes the image flexible and allows you to enlarge images without losing any quality or having any pixelation.
How does SVG work?
Scalable Vector Graphics (SVG) displays two dimensional drawing using XML. They differ from other image formats like PNG, JPEG, or Gif.
If you take a png/jpeg image file and zoom in, you will start noticing that the image will start to blur and become pixelated. However, that is not in the case of SVG. SVG does not use pixels. Instead they use a two dimensional map that defines the graphics that you are viewing.
When you zoom in an SVG image, it won’t be pixelated and thus won’t become blurry. This enables you to enlarge your images without losing quality.
SVG images are commonly used for icons, icon fonts, site logos and branding images. In WordPress, you can use the SVG files for your company’s logo, icons or other graphics.
Why Can’t You Upload SVG Directly to WordPress?
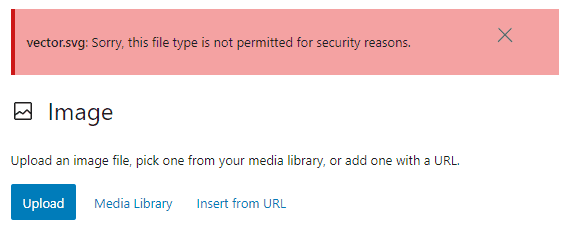
As mentioned above, you cannot upload an SVG file directly to your WordPress website. When you do, an error message “Sorry, this file type is not permitted for security reasons.” will appear on your media file.

Yes, there is a security issue with SVG files. A SVG file contains XML markup language code which is similar to HTML codes. This will enable your browsers or SVG editing software parse the XML markup language to display the output on the screen. However, this will open up your website to possible XML vulnerabilities. So, it can be used to gain unauthorized access to user data, trigger brute force attacks or cross site scripting attacks.
Therefore, the best solution is to only use the SVG files that are created by reliable sources and restrict the SVG uploads to trusted users only.
How to Add SVG to WordPress?
Now that we have discussed what SVG is, and why you can’t upload it directly in WordPress, let’s talk a look at how to add SVG to WordPress website.
One of the easiest ways to add SVG to WordPress is by using a 3rd party plugin. It enables you to safely upload SVG on your site and use them as per your requirements.
Upload and Add SVG Files to WordPress Using SVG Support Plugin
SVG Support is a free WordPress plugin that enables you to upload SVG files on your website. It is available on the WordPress.org repository and can be used without having to spend any penny.
Just download the plugin and install it on your WordPress website. Once the plugin is installed, activate it.
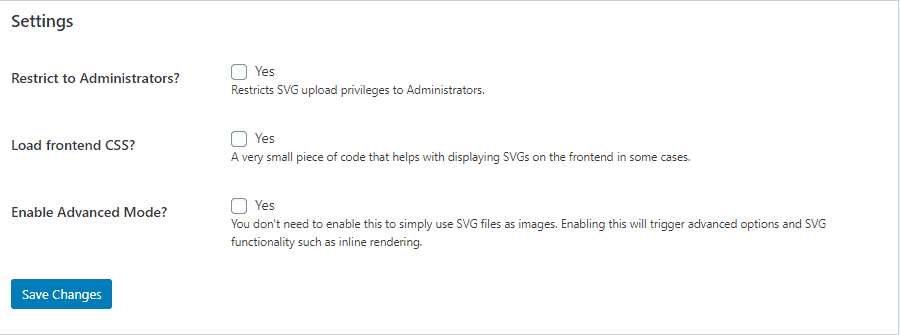
Upon activation, go to Settings >> SVG Support to configure the settings available on the plugin.
On the settings page, you can check the “Restrict to Administrators” to allow only the site admin to upload the SVG.

You can also check the “Load Frontend CSS” to display the SVG on the frontend with a small piece of code. Besides, you can enable the “Advanced Mode” to trigger the advanced options available on SVG like inline rendering and many more.
Once done, click on “Save Changes” to save your changes made.

