Have you come across a white screen with a “503 Service Unavailable” error message on your WordPress website? This error can be a frustrating one for the new users as it may completely render your site offline without giving you a clear cause.
There can be various reasons behind the 503 Service Unavailable Error. Here, we will discuss how it is caused and how you can fix it on the WordPress website.
Table of Contents
What causes 503 Service Unavailable Error in WordPress?
The “503 Service Unavailable” Error can often be caused by outdated and malfunctioning plugins and themes. The issue occurs when your website server has trouble getting response from the PHP script. This usually happens due to outdated or poorly coded script in WordPress themes and plugins.
Another cause for 503 Service Unavailable Error can be due to heavy usage of server resources. Almost all the hosting company provides a fixed amount of resources for each hosting account. For the website running on shared hosting, this limit cannot handle the heavy usage of server usage and could cause the 503 Service Unavailable Error.
Fixing 503 Service Unavailable Error in WordPress
Since 503 Service Unavailable Error has different causes and can’t often be sure what’s causing it, you will need to go about troubleshooting it methodically. Here are some solutions that can potentially fix the error.
Deactivate All WordPress Plugins
One of the common causes of 503 Service Unavailable Error in WordPress is plugin compatibility issues. To determine whether it is happening from the plugin or not, you need to deactivate all your site’s plugin.
Step 1: Login to Your Server:
As the 503 Service Unavailable Error prevents you from accessing the WordPress admin dashboard, you will need to use the File Manager in cPanel or a FTP client like FileZilla for this step.
For the demonstration, we will use cPanel File Manager since it is accessible to everyone.
- Open your cPanel server, using type/cpanel at the end of your domain name.
- Now, enter your username and password to login.
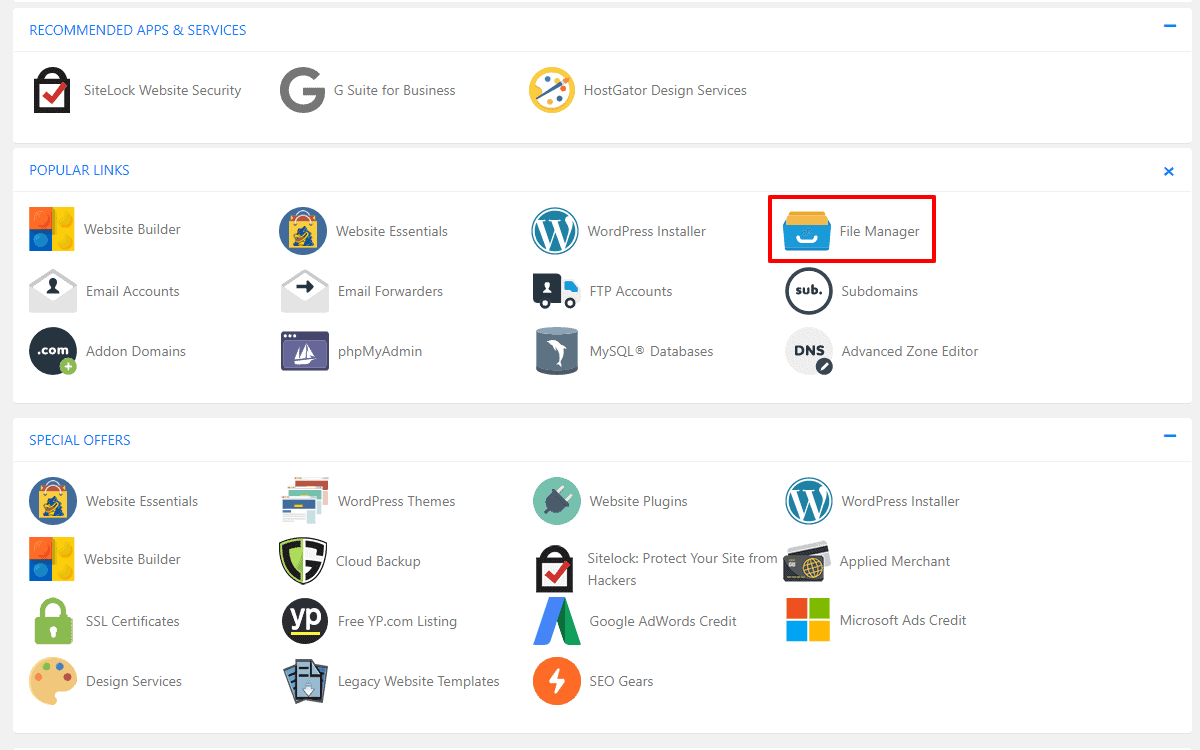
- Find the File Manager App

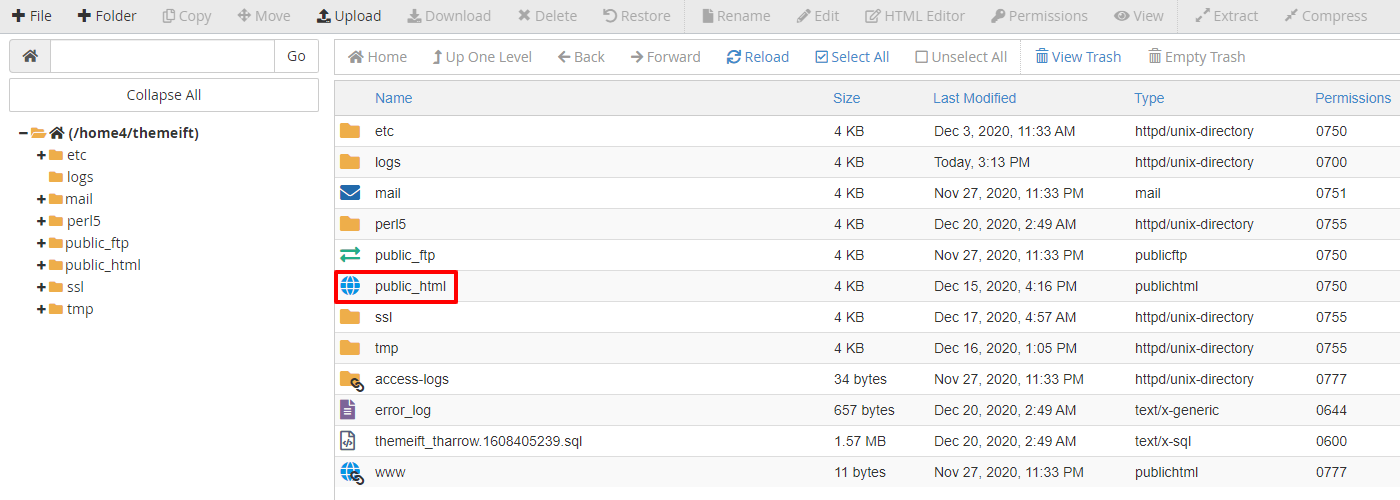
- Open Public.HTML folder.

Step 2: Rename The Plugin Folder
To deactivate the plugins, all you need to do is rename your plugin folder. To do so, follow these steps:
- Open wp-content folder from your cPanel File Manager app.
- Find the plugin folder and rename it.

- Create a new folder and name it plugins.
- Now, try loading your website and see if the issue is fixed or not.
Step 3: Find Out the Faulty WordPress Plugin
If your website is running back to normal, then the error is caused due to a faulty plugin. To find out the faulty plugin:
- Go back to the wp-content folder.
- Delete the empty plugins folder that you have created
- Now rename the old plugin folder to its original name. (This will restore all the plugins that you have installed on your WordPress website but they will stay deactivated.)
- Now login to your WordPress dashboard and reactivate your plugins one by one until you find out the plugin that is causing the error.
Switch to a Default WordPress Theme
If deactivating your plugins does not resolve your issue, then the next step that you can carry out is to switch to the default WordPress theme. This will deactivate your current theme and can resolve the issue.
To carry out this method, follow the steps below:
Step 1: Login to Your Server:
Follow the same instructions that we have provided in the previous method to login to your server.
Step 2: Delete The Theme
Once you have login to the server, locate your theme folder.
- Go to the wp-content folder and open the themes folder.
- Download your currently active theme on your computer to make a backup copy.
- Now, go ahead and delete the folder related to your current theme. (This will force WordPress to automatically revert your website back to an original WordPress theme like TwentyTwenty).
- Once done, check to see if your website works normally or not.
If your website works, contact the theme developer and ask them to fix the issue.
Temporarily Disable Your Content Delivery Network (CDN)
Sometimes, the 503 Service Unavailable Error might not be caused due to the problem on your website. Instead, it might be because of your Content Delivery Network (CDN).
If you think the 503 Service Unavailable Error is caused due to your CDN, try to deactivate it temporarily.
Every CDN should include some features to pause its services. The process may depend upon which CDN you are using on your website. If you can’t find the option to pause the service of your CDN, check out its knowledge base (documentation) which usually contains detailed instructions.
If you are not using a CDN or pausing its service did not help to resolve the issue, there are still other ways to resolve the issue. Remember to reactivate your CDN before moving on if you paused its service.
Limit WordPress Heartbeat
The WordPress Heartbeat is a builtin API that lets your website have an autosave post feature. It works in the background with a high frequency so that it does not miss anything having on your website. This functionality consumes your server resource may lead to 503 Service Unavailable error if your server can’t handle the load.
The quickest way to determine if the Heartbeat API is causing the error is to disable it temporarily. To do that, connect your website via FTP once again and open your current theme folder. Then, look for the function.php file.
Once you have found the file, right click it and select View/Edit option. It will open the file in the text editor. Once it’s open, add the following codes snippet in it right after <?PHP tag:
add_action('init', 'stop_heartbeat', 1);
 function stop_heartbeat(){
 wp_deregister_script('heartbeat');
 }
It will disable the Heartbeat API. Now, check your website to see if the 503 Service Unavailable Error is gone or not.
If the issue is gone, the API was the problem. But disabling it will altogether remove lots of useful functionalities of your website. So, instead we recommend you to slow down the heartbeat to make sure it does not cause problems.
The easiest way to slow down the heartbeat is by using the Heartbeat Control plugin. It will provide you with full control over the heartbeat frequency of your website.
But if the issue is not gone yet, the heartbeat API is not the problem. So, remove the code from your function.php to continue.
Increase Your Server’s Resource
If you are still getting 503 Service Unavailable Error in WordPress website, there is a good chance that it might be due to lack of server resources. Check out your Google Analytics page and if you are getting more traffic than usual, you are definitely due to short in resources. However, if you don’t have extra traffic, your problem might be due to inadequate server memory.
In any of such cases, you need to contact the hosting service provider.
Limit Googlebot Crawl Rate
Google and other search engines crawl your website to index your web content. They visit your website regularly to gather contents and determine the ranking metrics.
This crawling process can consume your server request and can slow down your site to cause a 503 Service Unavailable Error.
If you have such a case, you can limit the maximum crawl rate of your site from Google Search Console. In order to do so, go to the settings page or request Google to limit your site crawl rate.

Now, limit the maximum crawl rate of Google. Click on Save button to procee.

