Updates for WordPress themes and plugins are necessary to ensure the security, stability, and optimal performance of your website. Developers release updates to address vulnerabilities, fix bugs, and introduce new features. Staying up-to-date reduces the risk of security breaches, enhances functionality, and ensures compatibility with the latest WordPress version. Regular updates also contribute to a smoother user experience and help maintain the overall health of your website.
In instances where automatic updates aren’t accessible, the manual updating of premium WordPress themes and plugins becomes necessary.
When Does Automatic Updates for Themes and Plugins Don’t Work?
When automatic updates for themes and plugins aren’t working in WordPress, there are a few things to check. First, make sure that file permissions and ownership are set correctly, as this can sometimes cause issues. If you’re running into memory problems, try increasing your PHP memory limit. Security plugins might be interfering, so temporarily disable them to see if that solves the problem. Corrupted files can be a culprit, so consider reinstalling the theme or plugin manually.
Also, ensure that your WordPress core is up to date, and that you have enough disk space on your server. If you’ve made custom changes to a theme or plugin, compatibility issues may arise, and checking PHP version compatibility is crucial.
If automatic updates for themes and plugins in WordPress are giving you trouble, manually updating them can be a reliable solution. Begin by downloading the latest version of the theme or plugin from the official repository. Once you have the ZIP file, log in to your WordPress admin panel, and navigate to the “Themes” or “Plugins” section, depending on what you’re updating.
Update Premium WordPress Themes
Updating the premium WordPress Themes requires downloading a zip file. If you prefer to update your themes manually, given that automatic updates are not an option, follow these steps:
1) Download the.zip File
To manually upgrade your premium WordPress Themes, you’ll require the theme’s zip file for the update. Follow these steps to obtain the zip archive.
- Visit the official website of the theme or plugin.
- Authenticate using your Username and Password credentials.
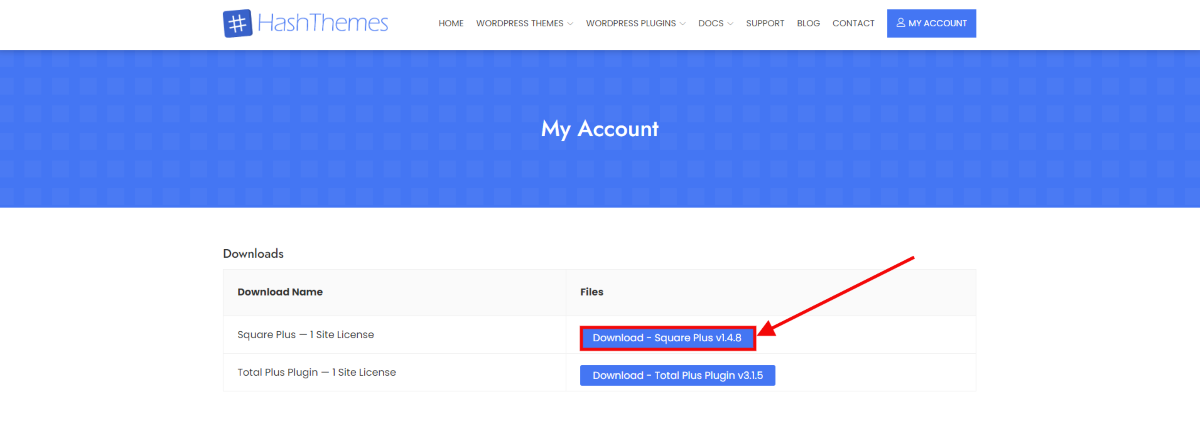
- Go to the page from where you can download the theme. In the case of HashThemes, click on My Account on the menu.
- Find the link to access the .zip file for the Premium Theme you’ve acquired. Simply click the Download button to obtain the Premium WordPress Theme.
- Save the .zip file on your desktop.
2) Upload the .zip File to Update
To manually update the Premium WordPress Themes the next step is to upload the .zip files. Follow these steps:
- Login to your WordPress Dashboard.
- Go to Appearance > Themes.
- Click on Add New Theme.
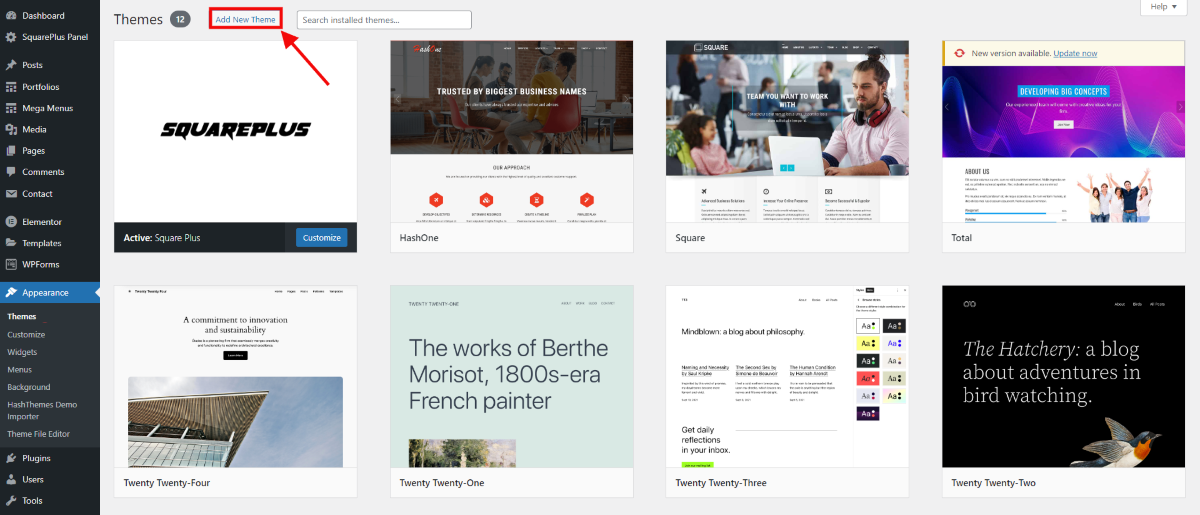
- You will be directed to a page displaying all the themes you have installed.
- Click on the Upload Theme at the top.
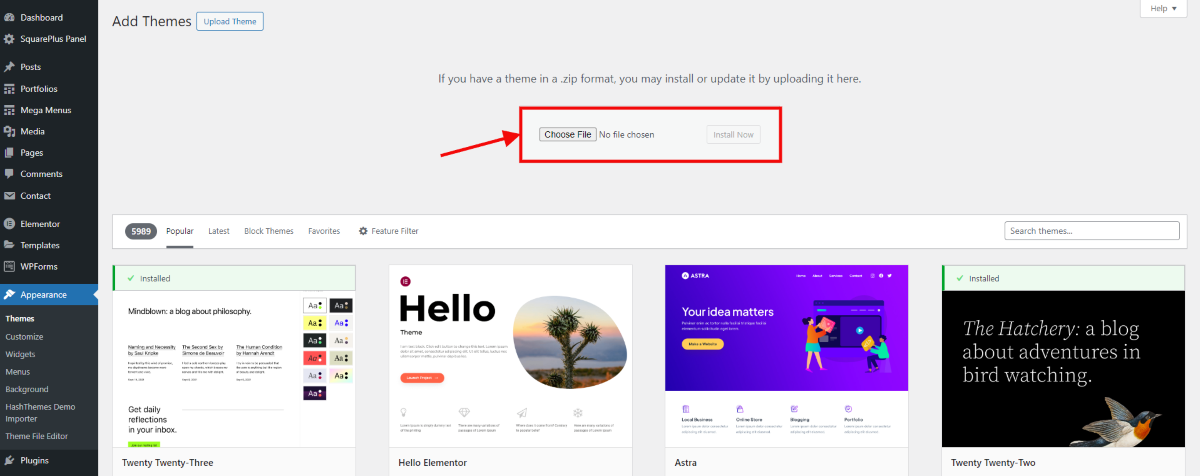
- Now, select the .zip file you downloaded earlier and click on Install Now.
- Once the new version is uploaded, activate it.
- Once the installation of the new version is complete, you will see that the update has been successfully applied.
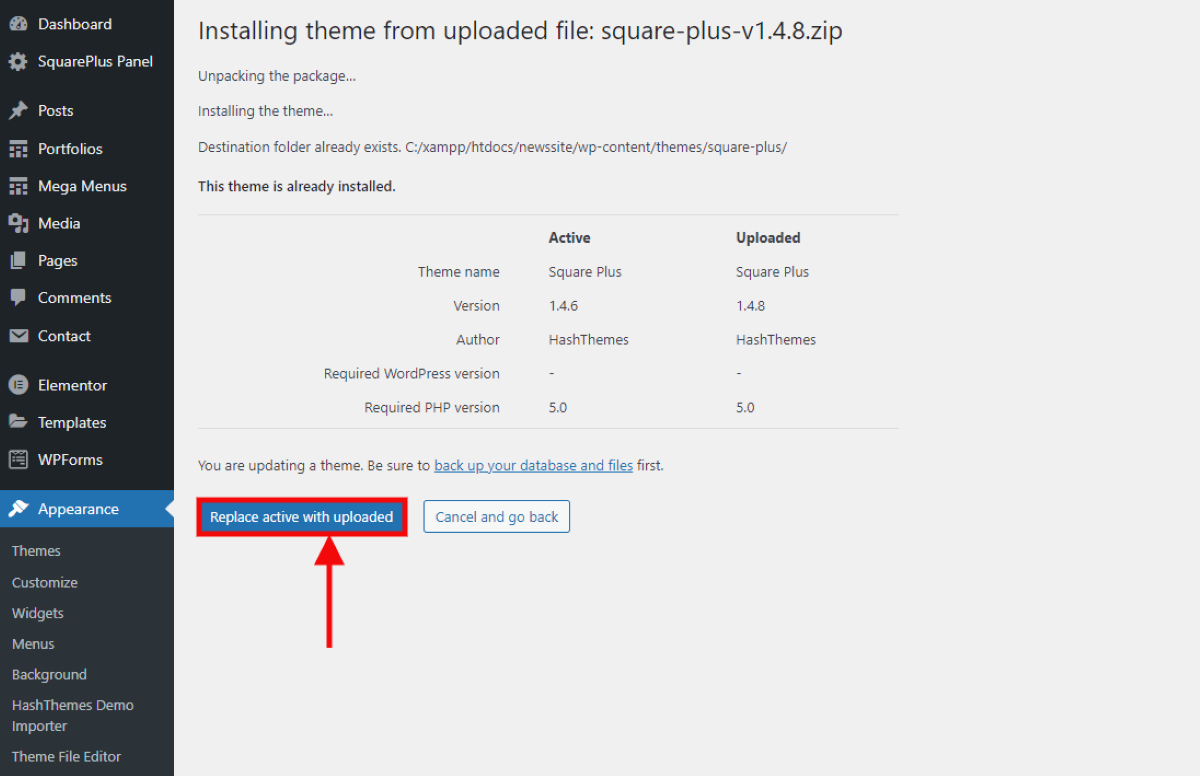
- Navigate to the option prompting you to Replace Active With Uploaded, and click on it. This action will install the latest version of the theme on your website.
- After updating, check your website to ensure that everything is working as expected.
Update WordPress Plugins Manually
Like themes, the plugins also require to be updated from time to time. To update WordPress plugins manually follow these simple steps:
1) Download the.zip File
- Visit the official website of the theme or plugin.
- Authenticate using your Username and Password credentials.
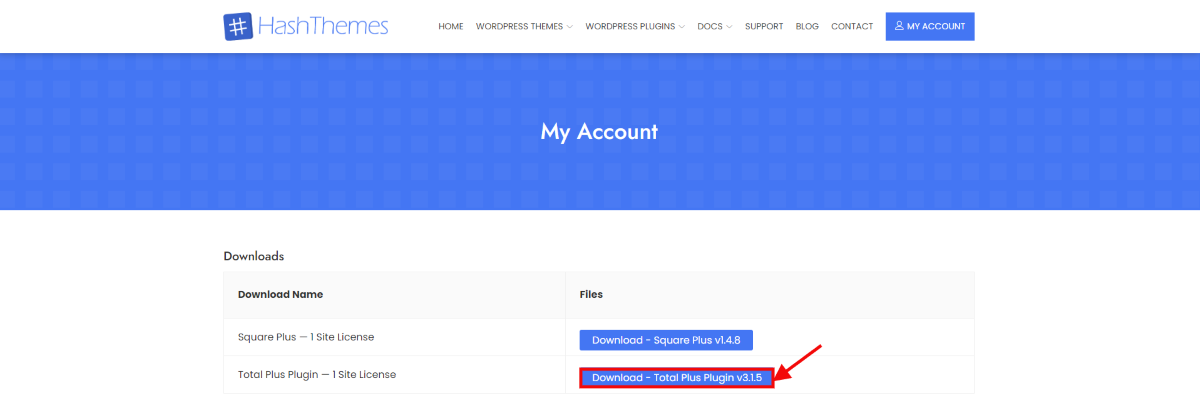
- Go to the page from where you can download the theme. In the case of HashThemes, click on My Account on the menu.
- Here is the link to access the .zip file for the Plugin you’ve acquired. Simply click the Download button to obtain the plugin.
- Save the .zip file on your desktop
Alternatively, if you wish to download the zip file from CodeCanyon you can follow these steps:
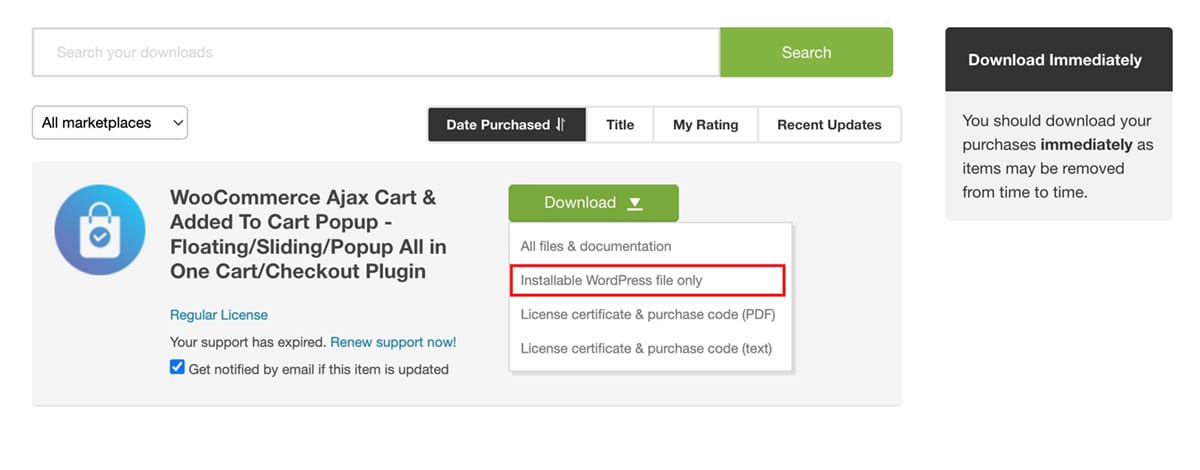
- Begin by logging into your Codecanyon account and navigate to the Downloads section by hovering over the top-right corner menu.
- Locate the Plugin in your list of downloads and check if there’s a newer version available.
- If an update is available, download the latest .zip file of the plugin and save it to your computer.
2) Upload the .zip File to Update
- Now, go to Dashboard > Plugins.
- Click on the Add New button and upload the recently Downloaded .zip file.
- Activate the new version of the plugin.

- Once the installation of the new version is complete, you will see that the update has been successfully applied.
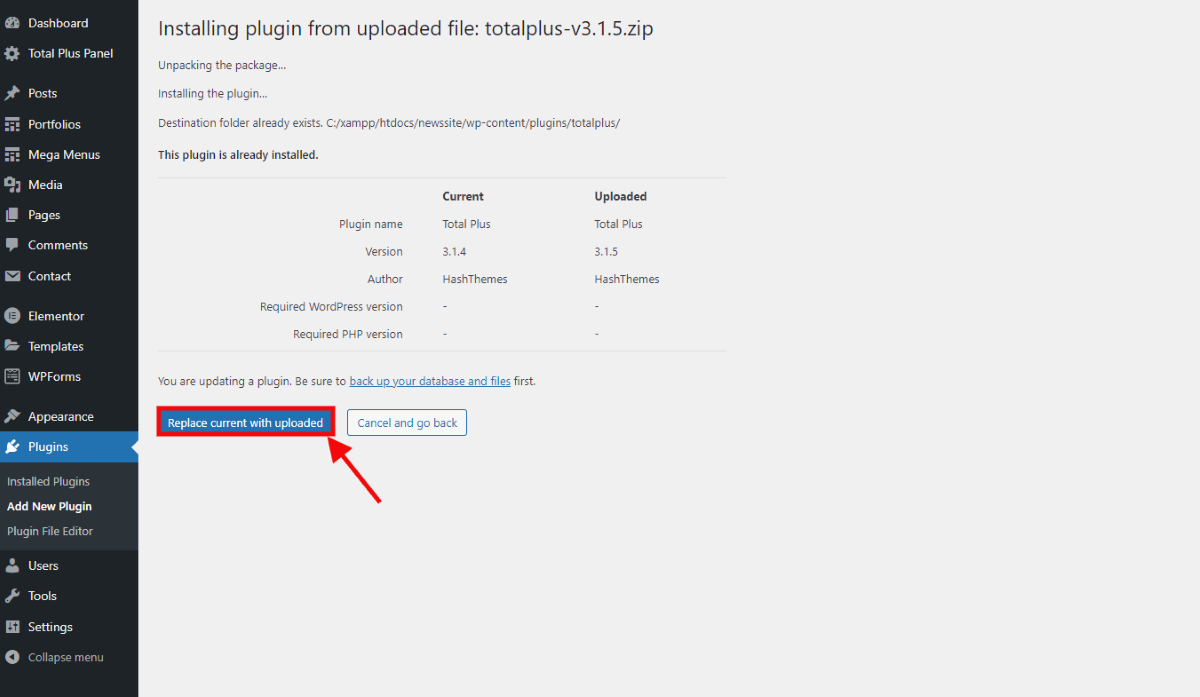
- Navigate to the option prompting you to Replace Current With Uploaded, and click on it. This action will install the latest version of the plugin on your website.
This is the process for manually updating premium WordPress themes and plugins, ensuring that you consistently work with the latest versions of your themes and plugins.


